When you create or copy a file on your Mac, it is assigned a path which is the actual location of the file on your Mac. Paths allow you to easily access any folder or file on your machine as they represent the full address of the saved file on your machine.
Sometimes you may want to reveal the path of a file on your Mac for various reasons. Perhaps you are writing a program that takes the file path as input. Or maybe you have installed an app on your Mac and it asks you to enter the path to your file.
Reveal file paths using the information box
If you’ve been using a Mac for a while, you’ve probably seen the Get Info option that appears when you right-click on a file.
This option opens a window in which all information related to your file is displayed. This information includes the file name, file type, file size, and most importantly – the file path.

To see it for yourself, open a Finder window, right-click on any of your files and select Get Info.
On the following screenshot, look for the label that says Where is it and you will see the full path of the selected file on your Mac. Shows which folders and nested folders your file is in.
While it works great for helping you find your file path, it doesn’t let you copy the file path as plain text if that’s what you wanted to do. You may want to check out some of the other methods mentioned below if you want to copy the path of a file to the clipboard.
Copy file paths from context menu
The context menu on your Mac is a really powerful tool as it allows you to do a lot more with your files than just rename or delete your files.
One of the useful and hidden options in the context menu allows you to directly copy the path of a file to the clipboard.

Since it’s hidden by default, it won’t show up when you right-click a file on your Mac. However, showing the option is fairly straightforward and all you need to do is press and hold the Option key. This will make the option visible in the context menu.
To use the option, right-click on a file in the Finder, hold down the key
Option key on the keyboard and you will see the Copy “file-name.ext” as Pathname option. Click on it to copy the file path.
It will have copied the path of the selected file as plain text to the clipboard.
Use Finder to view file paths
You might think that if Finder is a file management app, why doesn’t it offer the function to copy file paths? Unfortunately, the current version of the Finder doesn’t have an already visible option to copy file paths.
However, that doesn’t mean there’s really no way to view file paths using the Finder. There really is a feature, not built to reveal file paths, but it helps you view file paths on your computer.
It is called the Go to the folder function and is actually made to help you get to a location on your Mac. But you can use it to reveal file paths as shown below.

While in a Finder window, click to go at the top and select Go to the folder.
When the dialog opens, drag and drop a file into the input field and it will be filled with the path to your file. You can then copy the path to the clipboard using Command + C.
View file paths using the terminal
Many users may think that the Terminal app on your Mac is only for programmers or people who love programming. While this is true and the app allows you to run various commands, it can also be used for basic tasks like copying file paths.

The app helps to reveal the file paths and it is quite easy to do. Launch the app on your Mac and drag and drop a file into its window. The full path of the selected file will appear in your Terminal window.
It is also useful when you are typing a command and need to type the full path to a file. Instead of typing, you can drag and drop the file and it will fill in the required input for you.
Create an automation service to copy file paths
If you’re using a version of macOS that doesn’t offer the ability to copy file paths from the context menu, you can add the option to the menu yourself using an Automator service. An Automator service is a set of user-defined tasks that are performed when the service is invoked.
It might sound too programmatic, but doing it in practice isn’t that hard. In fact, all you have to do is drag and drop an action from here to there and you’ll have your service ready with Automator.
- Start the Automaton app and select Service followed by Choose. It will allow you to create a personalized service on your machine.

- Configure the options at the top of the main panel as follows:
Service receives selected - files or folders
in - Finder

- Look for the named action Copy to clipboard in the left panel and drag it to the main panel.

- Your service is ready and it’s time to save it. Click on File at the top and select Save. Enter a name for the service (this is what will appear when you right-click on a file) and press Save.

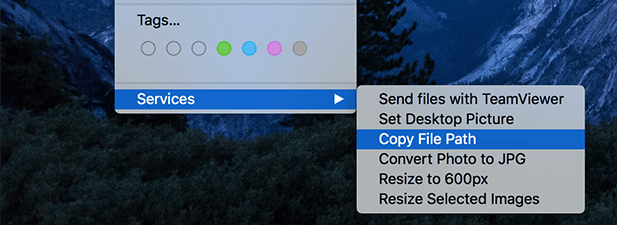
You are now ready to copy file paths using the context menu on your Mac. Find the file whose path you want to copy, right click on the file and select Services followed by the name of the service.
The full path to the file will be copied to the clipboard in plain text formatting.
Bonus tip: Assign a keyboard shortcut to the Automator service
If you want to make copying file paths even easier, you can assign a keyboard shortcut to your custom Automator service. Then, when you press this key combination, the path of the selected file will be automatically copied to the clipboard.
To do this, go to System Preferences> Keyboard> Shortcuts> Servicesfind your service in the list and assign it the keyboard shortcut of your choice.